Wednesday, May 28, 2014

Necklace of Summertime

I have a healthy sized collection of beads and components that I've gradually accumulated over the years.
When I get in my studio/workbench cleaning mode, I try to let go of those pieces that have been sitting around for far too long, ignored and adding to the creative chaos that I'm constantly trying to keep under control.
Anything that is not in the 'definitely keep' or the 'probably keep so that I can likely reevaluate in a couple of years' category gets donated to one of the local art centers.
 
My recent workbench tidying found me considering a large, vintage resin bead that I've had for at least 6 years, waiting for the right idea to surface.
Sometimes, I think you just have to decide that it's time to make an idea surface.
Just do it and be done!
I started by choosing a color palette of summer using carnelian, citrine and honey jade.
 
 
Because my feature bead is so large, I wanted to embellish the top and bottom with bead caps which I made with hand cut/hand textured discs of copper.

 I chose to make bead caps for the citrine beads as well, but not being round beads, those caps had to be formed with a bit more care.
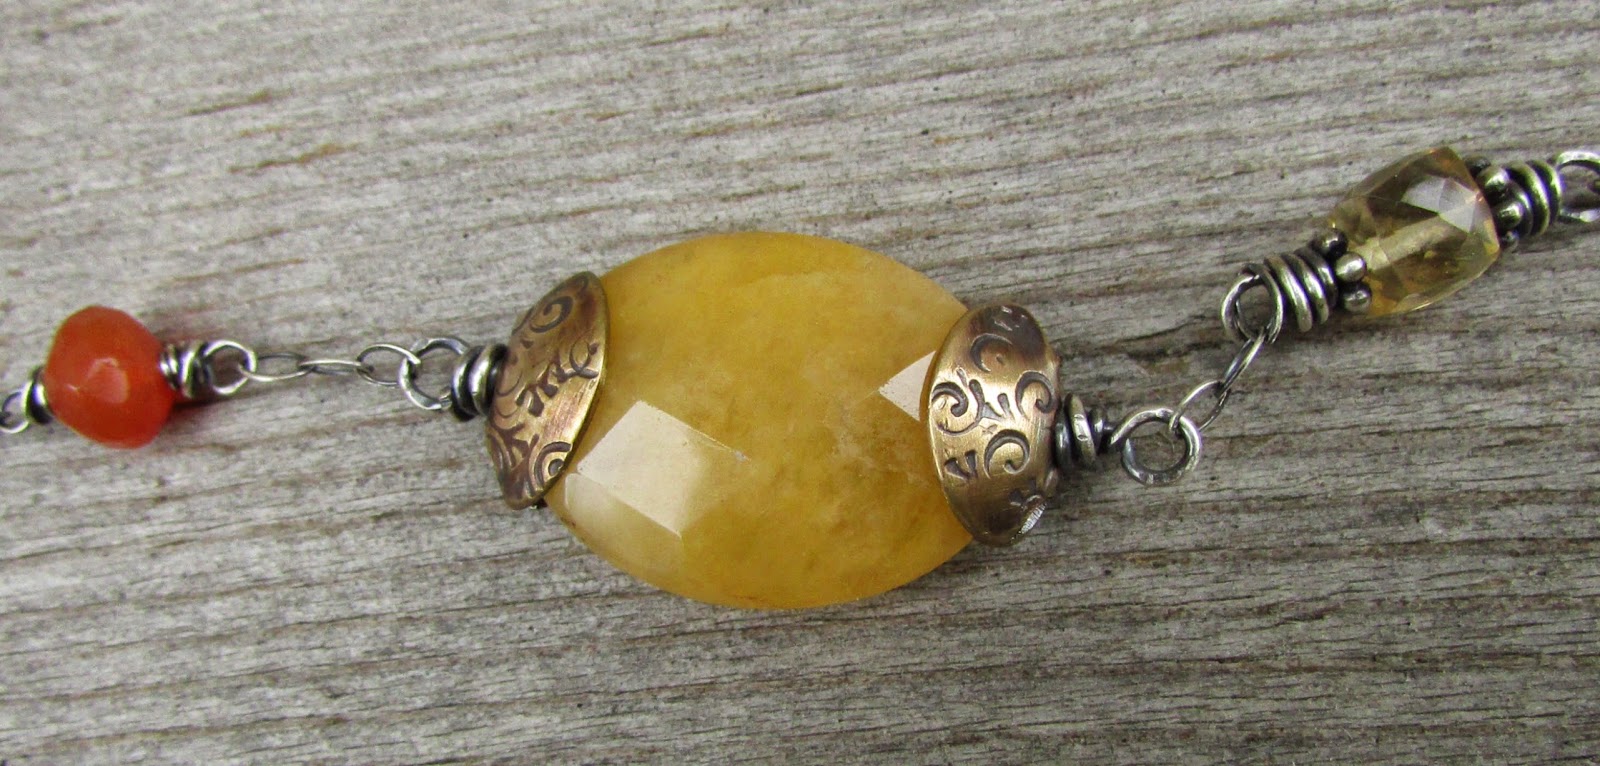
Pie shaped wedges were cut out of textured discs which allowed me to form the caps to the particular shape of the bead.
 
 Etched strips of silver nickel, textured discs of brass, sterling chain and sterling wire were also used.
 
 Finally...that bead has found a place that is no longer the surface of my workbench, and I have a necklace that speaks of the bright happiness of summertime.

Also speaking of summertime...
I have been using a weather piece of wood as my jewelry photo backdrop for a few years, usually keeping it outside near my picture taking spot.
When I grabbed the board to photograph my new necklace, I first noticed a small pile of sawdust on the ground and then the telltale perfect circular hole.
Darn!
Some carpenter bee had invaded my prize piece of wood right in the middle of the section that I prefer to use.
I decided that it was time to keep the board indoors to avoid additional holes, but thought I should first find out if there were any occupants in that current hole.
I started banging on the board with my pruning shears and sure enough....some very irritated buzzing started coming from within the board.
I kept banging until one ticked off bee emerged from the hole and flew away. 
 
The board now stays inside.
Sorry bee.

Saturday, May 17, 2014

Garden Inspired

I think that my garden is at its prettiest at this time of year. 
Different flowers are blooming, and leaves still have that newly-emerged vibrancy to their color.
Bearded irises in the side garden.
Blossoms on the back yard apple tree.
In the past 10 years, I have beaten the squirrels to the apples only once.
Those apples made the best apple crisp ever and possibly the only apple crisp from that tree.
Rhododendron along the driveway.
Petunia planter.
Luminous, new foliage on the back yard oak leaf hydrangea.
Columbine that has volunteered itself along the driveway.
My angel of the garden tucked in amongst the pachysandra, vinca and rhododendron.
 
I sometimes look to my garden for inspiration that I can bring to the workbench.
I've used dried leaves to roll print textures.
I've tried to capture the essence of floral forms in metal.
 
Last summer, I paid a little more attention to the seed pods of the Koelreuteria (golden raintree) in my front yard.
After a wonderful summer display of yellow flowers, bright green pods develop, and
the tree looks like it's covered with lovely, tiny lanterns.
Last summer, I thought it might be interesting to see if I could make this form out of metal.
I used an Xacto knife to carefully dissect a few pods so I could understand the separate shapes that make up the form.
I made patterns out of heavy cardstock.
As is typical, those patterns stayed tucked away on my workbench for a few seasons.
 
A couple of weeks ago, I finally decided it was time to try something with those patterns.
Using my metal shears, I cut out shapes of different sizes and began fold forming the pieces.
My initial thought was to solder pieces together to make the pod shape, but I began to like the leaf shapes that I was forming.
I now have enough of these copper leaves to start experimenting
with actual pieces of jewelry.
 

Monday, April 28, 2014

The Downside of Not Having a Signature 'Look'

When you're working in any kind of design profession, there's a real benefit to having an identifiable 'look'...a signature theme that customers, clients and/or gallery owners can easily attribute to you.
That 'look' will not guarantee successful marketing of your work, but it can definitely help.
So....of course, it's something that I constantly resist.
 
I think that my resistance is rooted in my background as a landscape architect.
I've always approached each landscape project as a very individual undertaking, responding to what the client wants and what the site wants.  
(new pergola and fruit garden in New Vernon, NJ)
 I like to think that I bring a thoughtful design sensibility that lets me solve issues in a unique and creative way....
(new patios and plantings in Wayne, PA)
...but my approach does not necessarily create a cohesive body of work.
 
(new pool, plantings and changing shed in Fort Washington, PA)
That's completely fine with me,
but I'm beginning to appreciate that my resistance to developing a specific 'look' is more of an issue with my paintings and jewelry.
 
I began painting around two years ago....not too long, but long enough to develop certain habits that I thought were limiting my ability to grow and improve.
I asked Georganna Lenssen, my instructor at Wayne Art Center, to give me challenges that would push me in a different direction. 
I've been working on abstracts and began this painting a couple of weeks ago.
Do I like this?
Maybe...it's in progress, and I don't know where it might go.
Has it created a reaction?
Yes.
I've been painting landscapes, and some of the people who've seen this new abstract have commented that it's "so not like me".
When I hear something like that, it makes me want to pursue abstracts with more enthusiasm because I don't like the idea of already becoming predictable.
Would landscapes and abstracts combine to make a good show in a gallery space?
Maybe not.....probably not.
That's all right.
 
Taking an abstract approach with my painting made me want to try something different with my jewelry.
I just finished some new necklaces that are distinctly different from my other work.
I'm thinking of these as my Galaxy pieces...they bring to mind something orbiting in space.
They're bold and shiny and....so unlike me.
I had one of these necklaces with me when I dropped new inventory off at Portfolio, Pennsylvania Academy of Fine Art's gift shop this past Friday.
When I showed it to the Manager, she and her assistant paused and said, "That's so different from your other work."
Being so different was not such a good thing as I suspected it might be, and the necklace came back home with me.
 
I understand that when a gallery/shop has limited display space, the owner wants to create a narrative with each artist's work...something that customers can connect to on an emotional level.
Maybe having pieces like these alongside my other work might be like inserting a chapter of 'A Clockwork Orange' into 'Sense and Sensibility'...it just doesn't work
(for most people).... 
and that's all right.
 
The necklaces will be at Woodmere Art Museum this coming Saturday for Meet the Artists.
Do you live near me?
If yes, I hope you'll stop by and say hi.

Sunday, April 13, 2014

New Bracelets

A few years ago, I became aware of fold forming, a technique of metal manipulation that involves folding, annealing, opening and hammering a piece of metal.
The development of fold forming is credited to Charles Lewton-Brain whose work is beautifully illustrated in his book, 'Foldforming'.
 
I decided I had to learn about this technique and bought Lewton-Brain's book, read any article that I could find, looked up YouTube videos and took a workshop with Wendy Edsall-Kerwin.
 
In Wendy's workshop, I made a couple of foldformed cuffs, and thought that I had found
'my thing'...the thing that I could explore and take small ownership of in my own way.
None of the shops where I sell had anything like the foldformed cuffs that I began to make, so I got busy.
I worked primarily in brass because I like the color that developed with multiple annealings.
With each cuff, I learned more about how to move the metal and how to sometimes let the metal take me in a different direction than I had planned.
I began delivering my cuffs to the shops and then a disappointing thing happened....
nothing.
Well....it wasn't a total nothing.
The cuffs did get customer's attention because they do kind of call for people to pick them up and touch them.
But they weren't selling.
I came to appreciate that with wide cuffs like the ones I made, they either fit perfectly or they don't fit at all.
There is no comfortable middle ground.
I feel proud of the work that I was doing and even though I wanted to continue to make foldformed cuffs, it didn't make sense.
 
Like anyone trying to make some kind of living with their artwork or craft, if it doesn't sell, it doesn't pay the bills.
I don't have the luxury of pursuing an artistic outlet just because it satisfies my soul.
It also has to at least try to satisfy my bank account.
 
I started to take a different approach with my bracelets, thinking that if they were somewhat fluid, they would be a more comfortable fit for more people.
I began combining etched and milled metals, linking segments together with heavy gauge jump rings.
I like to have a central focus like a resin set image or a bezel set stone.
Like the foldformed cuffs, these bracelets have been getting customer's attention.
And....oh happy day....some of those customers are buying.
 
The bottom two bracelets will be available at
on Saturday, May 3.

Friday, April 11, 2014

Bead Fest Tools

Beadfest is in town for the weekend, and that can usually mean trouble for my wallet.
It's entirely too easy to convince myself that my bead supply is lacking particular colors and that I need more tools.
I could just not go to the show, but that's just silly.
I always know I'm going to go.
 
I'm proud that I showed tremendous restraint and only bought the items that I intended to get.
Well...almost.
I didn't intend to get the mandrel, but I didn't know one was available at that size so I didn't even know to want/need it until I saw it.
This is how one's wallet can get into trouble.
I got a long wished for anneal pan so that when I'm annealing pieces, I won't pick up leftover soldering scrunge.
All right....scrunge is not a word, but if you do soldering, you know what I'm talking about and that stuff should be called scrunge.
I got a third hand tweezer with base for those delicately balanced soldering jobs.
 
And the item that I was especially happy to get is a new, small wooden dapping block with 2 punches.
This is such a simple and inexpensive item, but it's one that I use
A LOT.
 
I forget how many years I've had my older, now retired dapping block, but it's kind of beaten up.
I didn't mind too much that the depressions in the block had seen better days, because the block still did the job.
 
The problem was the punch that I prefer to use.
I was recently shaping etched discs for some earrings and with one of my hammer hits...
little pieces of wood went flying.
It's never good to have bits flying when shaping metal.
The impact end of my punch was disintegrating.
Of course, I kept using it, but I was using caution with my hammer strikes which meant I wasn't distributing force in an even manner.
Time for retirement.
 
Several vendors had small wooden dapping blocks, but the first three that I saw had punches that I didn't like....they were too narrow.
When I find something that works, I stick with it so I would not compromise.
 
Lucky me...the last tool vendor had exactly what I wanted and
I can get back to shaping my discs.

Tuesday, April 8, 2014

New Pendant, New Necklace

Taking advantage of my increased soldering confidence, thanks to the recent sea glass necklace, I soldered a few new bezels to be used in bracelets.
I decided I really like the bail that I designed for the sea glass pendant and made a similar one for a new pendant.
This new bail is made from copper that has a subtle roll printed texture and it's soldered on to a piece of 20 gauge copper that I had previously etched.
 
The soldering should have been simple, so of course....it was not.
I sweat soldered the back of the bail, propped the end of the etched copper just a tad to account for the dimension of the curled shape.
I'm not even sure what I did wrong, but after two soldering attempts, I still had two separate pieces.
BLEH!
I decided that I would give it one more try before I gave up for the evening, and I pulled out the secret weapon...
paste solder.
Using my soldering pic, I held the bail in place (all right....I was so frustrated, I was actually stabbing it) and the solder flowed the way I needed it to flow.
Happiness.
 
After a soak in the pickle pot and a cleaning with the brass brush, 
I used balled copper wire to rivet the bail backing to the etched brass front piece.
A few years ago, I had purchased a variety of stone cabochons so that I could practice my bezel making skills.
I have no idea what this stone is, but it makes me think of an Easter egg, so I thought it appropriate to use it as the holiday approaches.
 
I liked the recycled copper wire links that I used in my jasper pendant necklace, so I made more.
This time, I decided to use one of my steel stamps to add some texture to each side of the links.
 
Complementing the hints of color in the pendant stone, I worked with prehnite and honey jade beads.
More etched copper was used to make bead cape for the honey jade beads.
 
Once everything was assembled, the necklace was treated with liver of sulfur....
 
and then cleaned with fine grit sandpaper.
 
Completed necklace...
with recycled copper wire links, formed and drilled copper discs, sterling wire wrapped prehnite and honey jade beads, sterling chain and sterling clasp...
 
and one Easter egg pendant.
 
This necklace will be part of my inventory at Woodmere Art Museum's
on Saturday, May 3.

Wednesday, April 2, 2014

New Necklace- Bezel Set Jasper Pendant

A few years ago, I bought a strand of round jasper beads. I had no idea how I would eventually use them, but found these beads so beautiful because of the interesting crystalline formations and the range of colors.
These beads have a single hole drilled through the center, but I decided to a bezel setting.
After my (eventual) sea glass success, I was feeling more confident about making a large bezel and laid out the likely candidates for a new necklace.
I made links out of heavy gauge , recycled copper wire and cut a piece of brass that had been roll printed with ornamental grass from my garden.
Preparing to make the bezel, I realized that the bezel wire I had purchased for the sea glass pendant was not wide enough to make a secure setting for the jasper bead.
I thought..."not necessarily a problem...I'll make a bezel out of etched copper."
The reason that many bezels are made out of sterling silver (and especially out of fine sterling silver) is that during the fabrication process, the sterling stays soft enough to press it into place with a bezel roller.
I thought if my copper was a light gauge, I would be able to shape it without much difficulty.
Well...not really.
 
I sized my bezel strip using geometry....yes, math really does come in handy.
I soldered the strip to form the circle and then soldered it onto my brass base with surprisingly little difficulty.
The challenge was rolling the top of the bezel into place to secure my jasper bead.
The first few compressions with my bezel roller were beautiful....firm but gentle pressure moved the copper easily.
The thing is...the more metal is moved, the more work hardened it becomes, and pretty soon, my copper bezel was seriously resisting my firm but gentle pressure.
It took quite a while to get the bezel to the point where the jasper was in place and I had a relatively smooth form (acccck....I couldn't completely smooth out that part just past one o'clock). 
The brass-with-bezel was then riveted on to a piece of etched copper that had 2 copper jump rings soldered in place for connecting my chain.
 
The pieces then started to come together.
I chose aquamarine and citrine beads to complement the colors in the jasper beads and wrapped them with sterling wire.
Heavy gauge sterling jump rings were used to make connections.
 
After the necklace was assembled, I gave it a liver of sulfur treatment...
and cleaned all surfaces with a fine grit sanding block.
 
As usual, I made the back of the pendant interesting...
by using some etched copper.

The bezel was a bear to form...
but I like the added texture from the etched copper strip.
 
I don't like to have large, clunky pieces of anything on my neck,
so I chose to use sterling chain near the clasp....
making that portion of the necklace more fluid.
 
Done.
 
This will be one of my new pieces at Woodmere Art Museum's
on Saturday, May 3.