Friday, November 2, 2012

Painting Progression

Working on a current painting, I am always aware that I do not have as much control over the results as I would like to have.
Jewelry projects do not have the kind of mysterious variables that painting has for me.
Mixing just the right color, choosing the best brush for the right stroke, capturing the emotional atmosphere that I intuitively know I want.
I'm at a level of skill (or lack thereof) where sometimes the magic happens and sometimes it does not.
My current effort-
First Session
Second Session
Third Session
Parts of the painting have improved, and other parts?.....not so much.
This piece is asking for at least one more session to try to find the magic.

Thursday, November 1, 2012

Copper Tornado to Copper Bangle

So, you might ask, how does one go from a tornado of copper wire left over from a construction project to fun bangles?
First, measured lengths were cut using my favorite flush wire cutter.
While the cut is pretty clean, both ends of each length of wire were filed to ensure nice, flat surfaces.
Since these wire lengths are going to be soldered, those flat surfaces are necessary for a flush connection.
Not flush?  No solder flow.
Actually, I should amend that. 
The solder will flow.....it just won't flow where you want it.
Also, to maximize my chances for successful soldering, I sanded clean each end of the wire lengths since solder does not like to flow on dirty surfaces.
Each length was bent to bring the ends together.
Once the ends were together, I was ready for soldering.
At this point, the shape is of no concern. 
The only thing to focus on is maintaining a flush connection between the two ends.
In spite of doing what I thought was a good job of lining up my connections, I had trouble with some of my soldering attempts.
I find that as the metal heats up, it will occasionally shift, ever so slightly altering those carefully made connections.
That ever so slightly altering will usually mean a gob of solder where it is not wanted.
Sigh.
Once the soldering is completed, it's time to focus on forming.
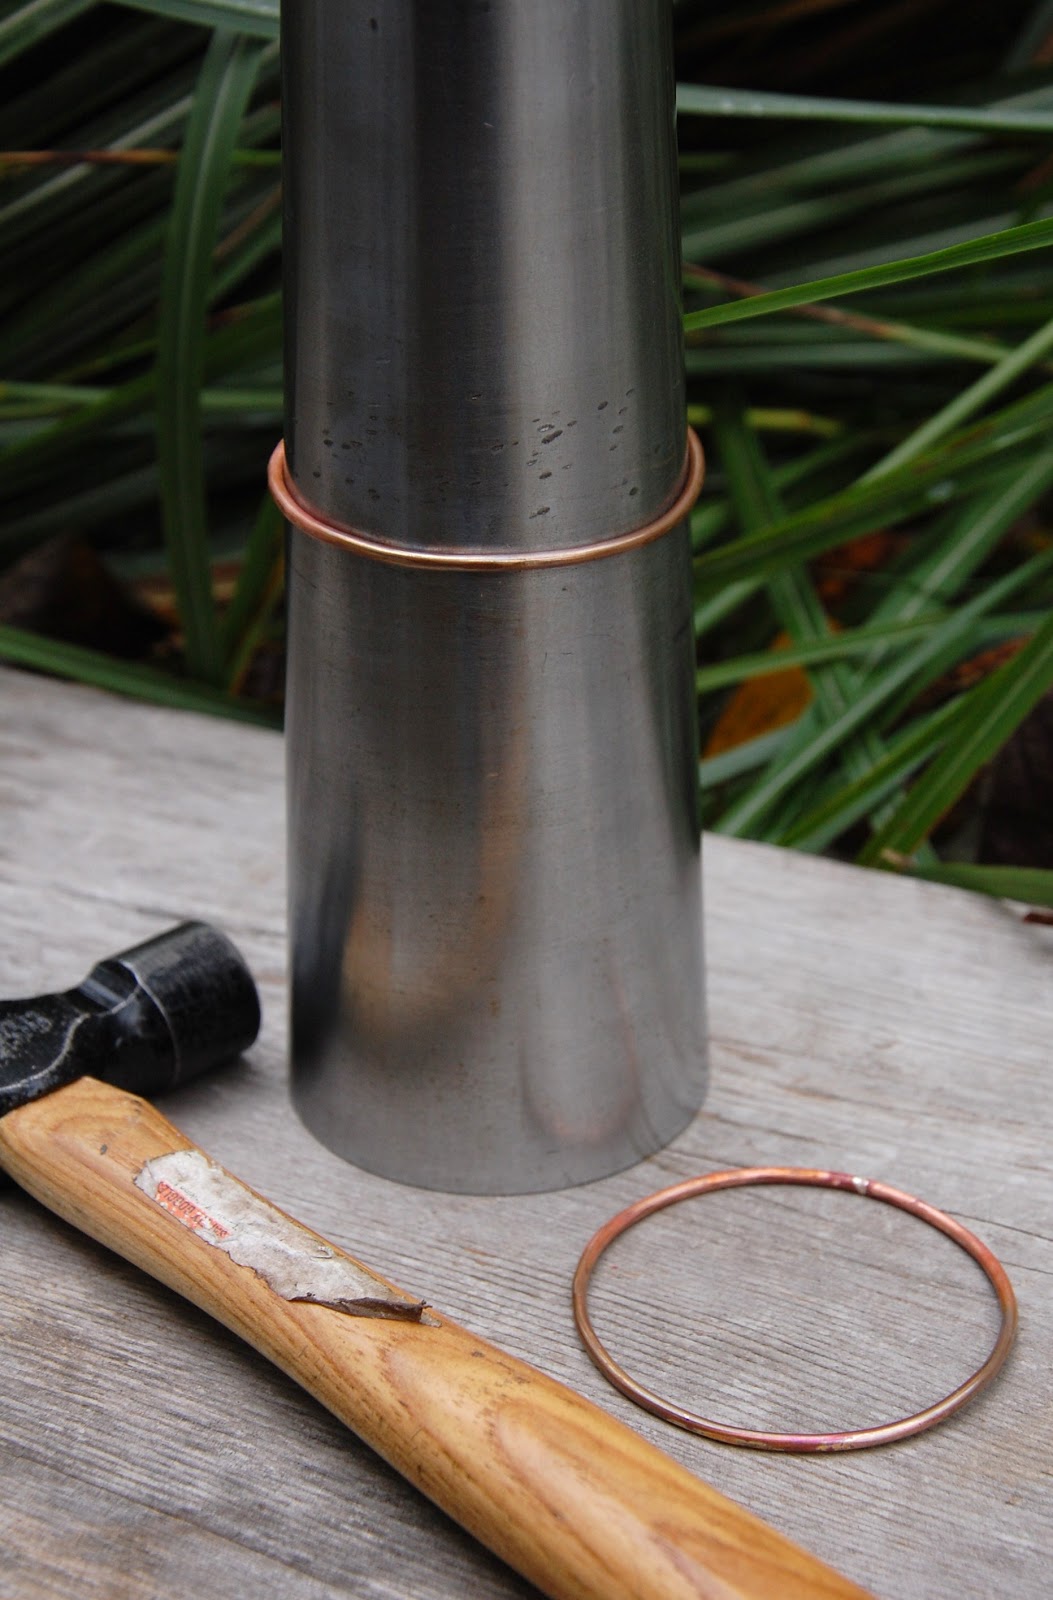
Each soldered wire was placed on my steel bracelet mandrel and hammered into shape.
The preferred tool....my trusty hammer from the hardware store.
The soldered wire was rotated as I hammered.
When there are no gaps between the wire and the mandrel, I'm done.
While working on the bracelet mandrel, I do pause periodically to put the soldered wire on my steel bench block to hammer it flat.
All of this hammering shapes the soldered wire into the desired bangle shape, and it also work hardens the metal so that the new shape is maintained.
For added interest, I textured the surface of each bangle with some of my steel stamps.
Each bangle was wire wrapped with a beaded dangle and then treated in a liver of sulfur bath.
Light sanding with a foam sanding block nicely highlights the stamped textures.
And there you go.....tornado to bangles.

Tuesday, October 30, 2012

Hurricane Sandy II

What does one do when the power is out and the sound of the storm is remarkably frightening?
Divert focus away from the howling storm and work by candlelight.
 
Our household is one of the very fortunate 1.2 million in Pennsylvania that lost power- ours came back on a short while ago.
My thoughts are with those who sustained property damage and personal injury.

Monday, October 29, 2012

Hurricane Sandy

Living a bit southwest of Philadelphia, I am unfortunately in the predicted path of Hurricane Sandy.
It's hard to pull myself away from the continuing coverage of the storm as it advances even though it only increases the feeling of dread.
Great....the pressure is dropping which I now know means that the storm is getting stronger.
It's hard to focus on anything, so of course I'm baking scones.
 
To anyone else in the path of this storm....best wishes, be safe!

Saturday, October 27, 2012

Yes, I Love Etching

This past week included more etching.
I love the results that I can get using ferric chloride and brass.
For this batch, I cut 1" diameter discs of brass and etched them with sections of text.
After neutralizing the ferric chloride with baking soda and scrubbing the discs with a brass brush and soapy water, I heated them with the torch and then lightly sanded them to highlight the etching.
I love the look of these oxidized discs, and while I could sit and gaze at their loveliness, they need to become something else.
I do work hard at keeping my pieces of jewelry unique, so similar components are used in a variety of ways.
This time, I cut out 3/8" discs off center and domed the discs in my dapping block after drilling holes at the top and bottom. 
Hanging below are sterling wire wrapped dangles of garnet, pearls and crystals.
The discs hang from sterling ear wires.
I will ponder the loveliness of the remaining discs while I consider how to put them to use.


Copper Sticks Necklace Revisited

I've had requests for more 'Copper Sticks' necklaces, and I decided to revisit that necklace from a more delicate and refined perspective.
This variation is made with sterling silver, pearls and prehnite.
Segments of heavy gauge sterling wire were hammered to create paddle shapes at each end which were then drilled for necessary connections.
Faceted prehnite rondells were attached at the bottom of each section of hammered sterling wire with light gauge, balled sterling wire.
Each section is connected to sterling chain with a sterling jump ring.
Small, freshwater pearls are wire wrapped onto the chain..
 
I'm liking this more refined version, but once I saw the necklace on the display form, I thought, "hmmmm....maybe needs some more pearls along the chain; maybe some tiny crystals too."
It's sometimes hard to know when I'm done.

Monday, October 22, 2012

October 22, 2012

 
“It's so much darker when a light goes out than it would have been if it had never shone.”
  J. Steinbeck