Monday, October 15, 2012

You Guessed It.....More Cuffs

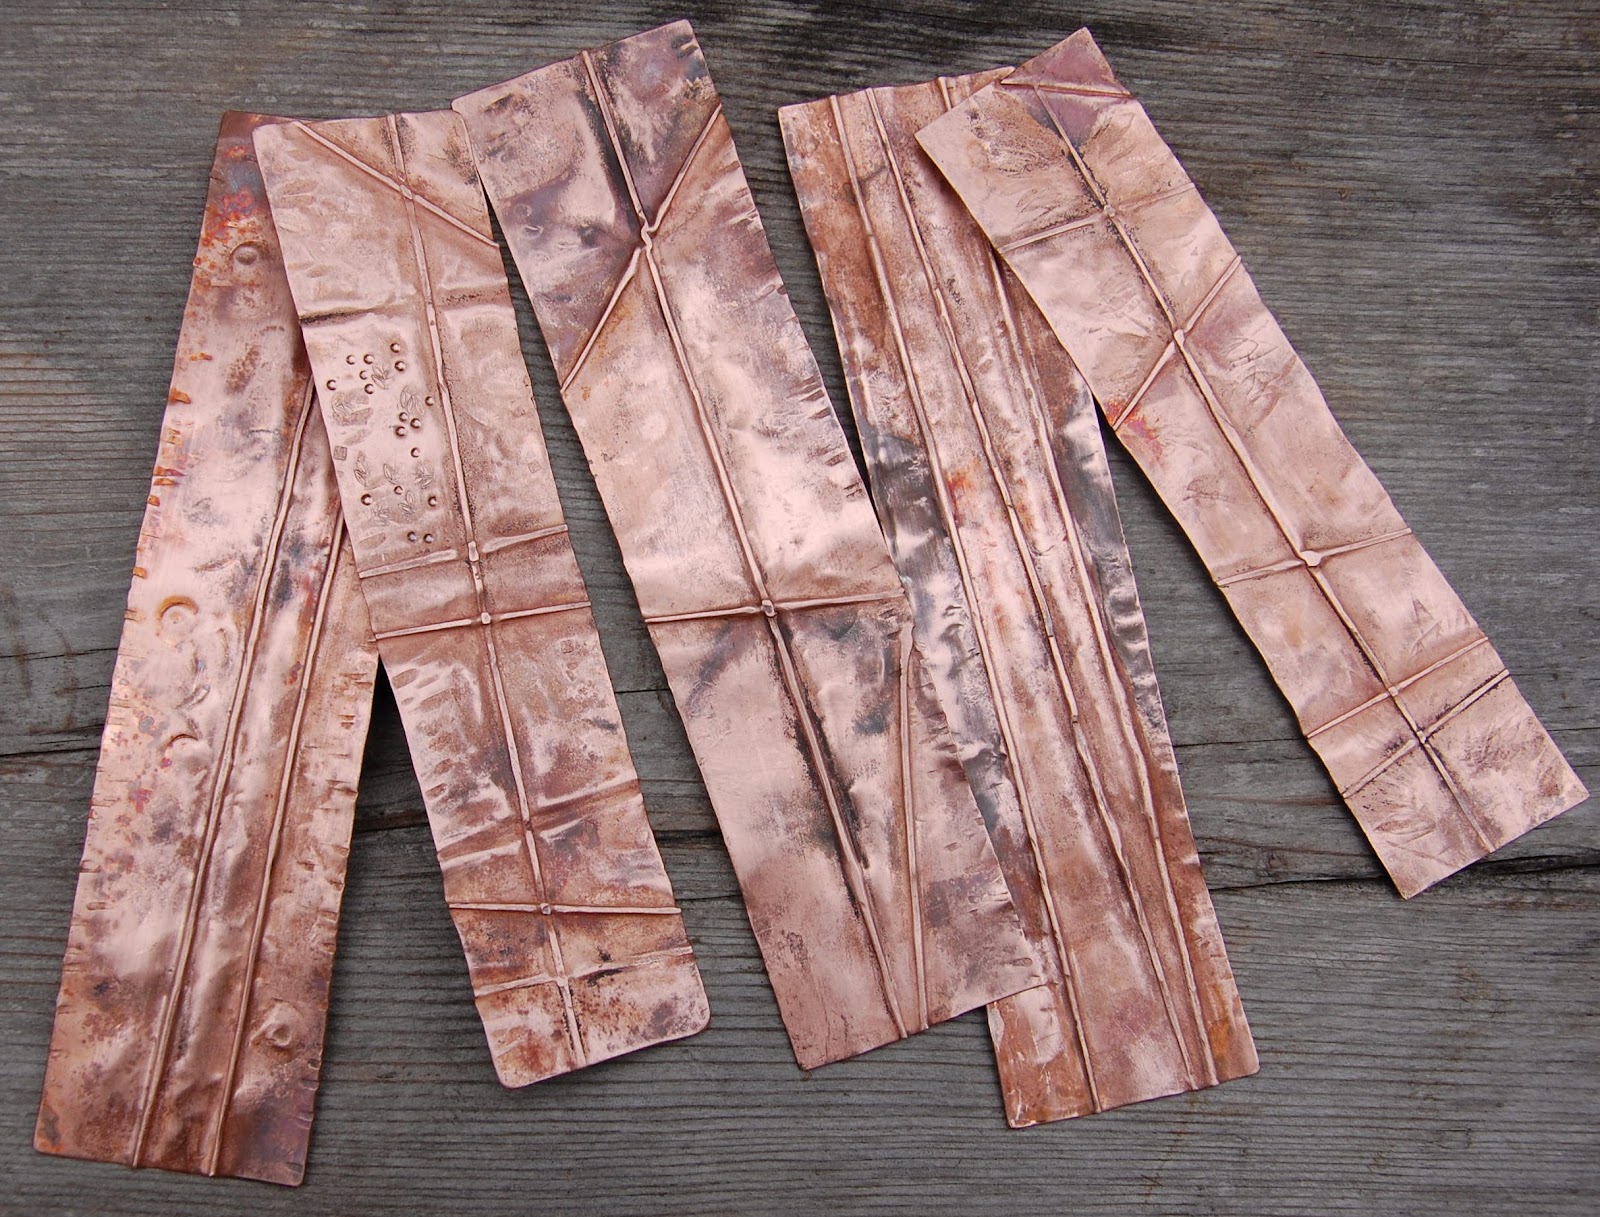
My acetylene tank was just recently refilled, and I'm slightly obsessed with making fold formed cuffs.
I love that I can take a simple strip of copper and transform it using heat and a few tools.
Texturing the above, I used a dapping punch, a ball peen hammer, an old chisel and a center punch.
This one....another dapping punch and a decorative floating seed steel punch.
This one....the old chisel, a circle punch and a decorative star steel punch. 
I sometimes get on a production kick, making pieces because I want to keep exploring different, creative possibilities.
The thought of who, if anyone, might actually buy any of these pieces is something I concern myself with after the fact.
Lucky for me that these cuffs have captured the interest of more than a few people.
Whew...I can keep having fun exploring the possibilities.

Friday, October 12, 2012

The Up Side of Not Caring

Almost a year ago, I began oil painting one night a week at Wayne Art Center.
It remains a real struggle for me to capture on canvas the images that I can so clearly see in my mind.
I'm in a Portrait Painting Tradition class, so of course, I'm painting landscapes.
When I went to class last week, I brought 2 canvases with me.
One was the painting of the farm field across the road from Chanticleer which still needs at least one more session before I could consider it finished.
The other was the beginning of a landscape that I started at home.
With that second landscape, I violated one of the basic 'rules' that our instructor, Georganna Lenssen, has taught us.....always refer to something real (actual setting, a model, a photograph) when painting.
No, me of questionable skill decided to go off the grid and paint that image that was just in my mind.
I didn't photograph it, but that initial session yielded a pretty dismal beginning of a landscape.
 
When I was deciding what I would work on for the class, I found myself too afraid to to work on the farm field.  I'm liking that painting and fear that I might ruin it with additional work.
That fear made me look at my loser landscape, thinking, "What the heck....it stinks.  What harm can I do?"
What a liberating attitude. 
I decided to try something different and painted using only my palette knife.
I would never suggest that this is a wonderful painting, but it is definitely a wonderful improvement.
Not caring allowed me to trust my instinct and allowed me to learn by trying something new.
Yeah...I'm still too afraid to work on the farm filed.
I've got to work on that fear thing.

Wednesday, October 10, 2012

Etched Discs

With a grouping of discs to be textured for upcoming projects, part of last night was dedicated to etching.
I suspended my discs in a bath of ferric chloride using a scrap piece of styrofoam.
An hour later....lovely textured metal.
Some new patterns were tried, and I've decided they belong in the regular lineup.
While I do like the subtlety of the discs freshly cleaned after the ferric chloride etching, I wanted them to have a bit more drama.
I annealed the discs which turned them black, and instead of putting them in the pickle pot, I used a sanding block to better reveal the patterning.
Each disc was drilled with two holes and domed in my wooden dapping block.
Tonight's plan....turning these discs into earrings.

Monday, October 8, 2012

More Fold Formed Cuffs

My previous fold formed copper cuff was part of a small grouping that I worked on a few days ago, streamlining my efforts to maximize output.
The number of cuffs that I chose to work on was determined by the number of pieces I could fit on my solderite pads at my soldering/annealing workbench.
Once I had shaped the cuffs with the help of my bracelet mandrel, I cleaned the surfaces with a fine grit sanding block, revealing a fairly clean copper surface.
While I think this clean copper surface looks lovely, I appreciate the fact that metals will oxidize and maintaining this brightness is a real challenge.
Wax and/or lacquer can be used to protect a finish, and I am still in search of one that holds up to the effects of oxidation as well as exposure to oils and perspiration of the wearer.
Luckily, I like the patina of oxidized metal.
I like the warmth and richness, and I like how surface textures can be perceived with greater dimension.
Many of my copper and sterling pieces get treated with liver of sulfur to immediately develop a patina.My new cuffs were put in a solution of liver of sulfur that had been dissolved in hot water.
To develop the patina, each piece was dipped until darkened, removed and wiped with a soft cotton cloth and dipped again.
I repeated these steps four to five times for each cuff.
A light cleaning with a fine grit sand block highlighted the details, especially in this cuff.
The copper strip for this cuff was first milled with some dried flowers, leaving ghostly impressions.
 As shown in the last posting, fold forming creases are nicely highlighted with the same sanding block.
I love the way the copper takes on the appearance of well worn leather as the patina develops.

Friday, October 5, 2012

Fold Formed Cuffs

Having access to a torch once again, I am so happy to be working on new copper cuffs.
A sheet of copper that was a construction project leftover had been given to me last year (contractor friends are awesome!), and like my copper wire tornado, I frequently cut off sections for new projects.
To make cuffs, I cut sections that are approximately 6" x 1 1/2".
This is when a torch comes in handy.
I annealed the copper, folded it and hammered away.
Then I annealed the copper, opened the folds and hammered away.
Then I annealed the copper, folded it and hammered away.
Then I annealed....you get the point.
Fold forming metal that is a gauge suitable for a cuff can only be done with a torch. 
After repeated annealing/folding/hammering steps and adding various textures with steel stamps and dapping punches, a few of the copper strips were ready for shaping.
For cuffs, I like to use my round, stepped, cast iron mandrel.
Once I had a shape that looked balanced and felt comfortable, I developed a patina using liver of sulfur.
A fine grit sanding block was used on the surface to highlight some of the details.

Wednesday, October 3, 2012

Recycled Copper Wire....Again

My tornado of copper wire is still with me, and I periodically revisit it, cutting pieces for new projects.
As I prepare inventory for some retail locations, a request was made for a selection of items that might be on the 'lesser expensive' end of the spectrum, but still on the 'fun' end of the spectrum.
Frugally fun? 
No problem.
I decided to make bangles with some of my copper wire tornado.
Lengths of wire were cut, ends filed and then soldered.
After pickling, I formed the bangle shape on one of my steel bracelet mandrels, adding texture with a ball peen hammer.
To add that element of fun, different beads (amazonite, jasper, carnelian) were wire wrapped with balled copper wire.
That little burst of color moves freely while being completely secured on the bangle.

Thursday, September 27, 2012

Secret Admirer

A few years ago, I filled a special order for Valentine's Day gifts that were being distributed anonymously. 
I made necklaces, and to keep the budget where it needed to be, I cut copper discs and used plated chain.
For some reason, I chose to make an extra disc, but made it out of sterling.
I've had that disc in my box of sterling supplies for these past several years and finally put it to use a few days ago.
The sterling chain is wrapped with aquamarine, amazonite and pearls.
One side of the sterling disc was finished with a light hammering with my ball peen hammer, and hanging from the bottom are sterling wire wrapped pearls and aquamarine.
Like the previous copper discs, the other side of the sterling disc is textured and stamped with 'SECRET ADMIRER'.
The order that had been placed was for 17 necklaces, and I heard back that they were well received.
They also created quite a buzz.
As far as I know, the 'Secret Admirer' is still a secret.